
PowerShell
How to Run Parameterized PowerShell Scripts
Running PowerShell scripts is easy for experts who know their way around command line and know which parameters to use. However, what if you need to empower non-experts—such as junior team members or other stakeholders—to run those same scripts safely, without needing to dive into a terminal?
Adding a user interface is a great way to make your scripts easier to use, especially for folks who aren’t comfortable with the command line—and with Otter you can automatically generate a UI around your PowerShell scripts, enabling those who are less comfortable with PowerShell to run scripts without needing an expert to jump in.
In this article, I’ll talk about how Otter can generate a graphical user interface around your PowerShell scripts.
How to Use Otter to Run Parameterized PowerShell Scripts
⭐ Step 1: Install Otter
There are a lot of installation options for Otter, but the easiest is the Inedo Hub on Windows. After the download and installation (which takes just a few minutes), you can get right to work or take a few minutes to run the demo steps and familiarize yourself with the software.
⭐ Step 2: Add Scripts to Otter
To add your PowerShell script to Otter, navigate to “Scripts” > “Create Script” and select “PowerShell” from the list of available types. (You can also configure a raft if you want Otter to read your scripts from a Git repository, though this is more complicated.)
⭐ Step 3: Create a Job Template
You don’t have to do it this way, but we recommend job templates because they enable self-service with safety by defining usage restrictions. For example, you can restrict which servers a script may run on.
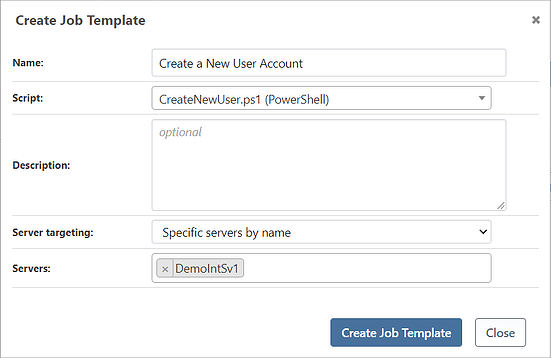
Job templates also let you define variable prompts.
⭐ Step 4: Create Variable Prompts
Otter can also generate an input prompt (e.g., checkboxes, a text box, select-from list).

This organizes the parameters for your PowerShell scripts into an accessible GUI executed as a job. And if you have Comment-based Help in your scripts, Otter will auto-generate these for your script. Check out this documentation page for more on the types of specific variable prompts Otter can create.

⭐ Step 5: Choose Your Server Targeting
Otter doesn’t just let your non-expert PowerShell users run scripts; it also allows those in charge to sleep more soundly at night by targeting only specific servers for a particular job or job template. Otter offers three types of server targeting:
| Type | Description |
| Direct | Best used for set-ups with just one or two servers, “Direct” specifies servers by name, and the script is then run against each server. This method can use variable names. |
| Indirect | Although it requires some planning ahead, “Indirect” specifies a combination of roles and/or environments that will be used to specify the servers the script is run against. This method can use variable names. |
| Custom | This method is the most flexible but also the most complex. “Custom” lets you perform complex orchestration that can run different commands or scripts on different servers. These servers can be targeted sequentially, in parallel, with branching and iterating (looping) logic. |
⭐ Step 6: Define Custom Server Targeting with Variables
To make sure scripts only ever run on the right servers, you’ll want to define your targeting to meet your specific requirements. To do this:
- Click “edit” on your job template.
- Choose “add” under “template variables (prompts).”
- Create your variable using the parameters you desire.
- Confirm that “Custom server targeting” is listed next to “server targeting”
- Commit changes.
Then, of course, test. If you’ve done everything right, when you (or anyone with access) go to create a job from that template, the targeting menu should look as you defined it. For example, I configured "TargetServer" to be a list-type variable with list values of testsv1, testsv2, and testsv3. I then tested the template and saw I did everything right:
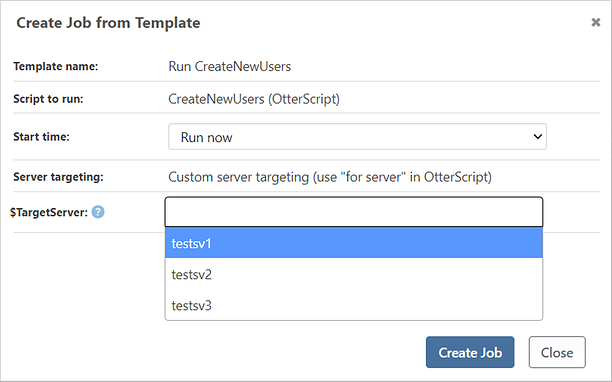
You can find detailed instructions for this step here.
Choose to Use the Right Tool for the Job
Otter is designed to help you run scripts because it automatically generates a GUI around your PowerShell. Otter helps un-bottleneck your team and safeguard your systems without extra costs.
This mini how to will probably be useful when you get around to making your own GUI, so I recommend storing it somewhere for reference! Better yet, sign up for our eBook “Ultimate PowerShell Level-up Guide” as well? It contains everything here and goes further into package best practices, custom GUIs, and more. Download your free guide today!
